Sunday, December 27, 2015

Assembling the Bay Area Yard's CSS Selma kit

My ACW naval collection addiction knows no bounds. So when Bay Area Yards added a model of CSS Selma to their product line I quickly purchased a copy. And that's where 'quickly' died. I think the hogging means intimidated me from tackling assemble.  Selma went into the backlog queue and garnered no attention.

Until now.


I pulled the kit out this week with the goal of assembling the model. The first step was a quick wash in hot, soapy water to remove any lingering mold release agent. After a year spent 'aging' on the shelf, the model appears to have cleaned up nicely after it's bath.


Second was trimming and sanding. The bottom of the hull had a little bit of flash. Nothing unusual when working with resin kits. The hobby knife and a file made short work of the flash. More troublesome were some bubbles of resin under the deck overhang. Using a # 58 drill bit on my Dremel (tm) tool, I was able to remove the resin bubble residue. This was being really picky as once the model is based, no one will see the work I put in under the decking.

Okay - let's get this party started! The hull in a nice single piece that contains the superstructure and wheelhouses. There is an identation for the hole that accepts the pin in the stack, but you need to bore it out. Again using the #58 drill bit in the  Dremel, I bored out the hole. The mast pin slid in easily. Using a little CA glue, I glued the stack in position, carefully lining up the secondary exhaust stack in line with the long axis of the ship.


The pilot house is a little rectangle. This is glued atop the superstructure on the forward edge facing the bow.

There is a skylight that is added to t he superstructure aft of the smokestack. A little CA glue will hold this part in place.


Overhead view showing the instaslled pilot house, stack and skylight over the cabin.


Next up is the hard part - the hog frames. These timber beams served as 'hog chains' designed to prevent the bow and stern from sagging or rising. The frames give Selma a distinctive look. Each frame needed light sanding to clean up the pieces and sharpen some edges. This was a delicate task and the hog frames are delicate pieces of resin.

The hog frames. You can see some rough spots in this close up that required a little sanding and filing.


Installation was done by applying a CA to the back of the frame facing the wheelhouse and the to the bottom of the four contacts with the deck. There is a little bit of guesstimation in where ti align the frames. I tried to center them best I could without blocking the view from the pilot house. Once one frame is installed, repeat the process on the other side.

The assembled model sans ordnance.

Overhead view of the bow end...

...and the stern end


At this point assembly is done. Next up will be painting the model and the guns.

Tuesday, December 22, 2015

Beast of the Yazoo River


A recent acquisition from Shapeways shop Infernal Machines was a 1/600 model of the unnamed Confederate ironclad known as the “Yazoo Monster”.  This ship, laid down at Yazoo City, Mississippi was never completed. But in the rich tradition of Confederate naval projects that never quite made it into action, this is a worthy addition to my collection.   
To paraphrase Nelson Muntz, from The Simpsons ‘historical records from this period are spotty, at best’.  However, some very good naval design archaeology is attempting to reconstruct what had been hidden. There’s a nice discussion on the Yazoo Monster over on Civil War Talk. There’s even a set of conjectural plans showing how the ship might have appeared.  Some of these plans served as the inspiration for the model from Infernal Machines.
As covered earlier in this blog, I had purchased a model of this ship earlier in 2015. Since then, it has been languishing in a box awaiting some paint. With the conclusion of my 1/144 biplane project, I’m moving back to ACW naval models. The Yazoo Monster was an easy project to get reengaged with the period.
The model was delivered from Shapeways as a single, ready to paint casting. I’d ordered it in Strong, Black and Flexible. Yes, it cost a dollar or two more, but the improvement in the smoothness of the surface pays for itself in time saved from preparing the surface.  I used a few coats of my Krylon gloss coat spray sealer and a little bit of light sanding with a 120 grit sanding stick (This plastic stuff is tough!) and I was ready to paint.
For painting, I endeavored to follow the teachings of award winning miniatures painter Bill Moreno (aka TMP member ACWBill) as conveyed in his painting guides to ACW naval miniatures. Bill’s guides are concise, clearly laid out guides to getting your models painted and on the table with the least amount of fuss.
First step was to prime the model using Krylon camouflage spray paint. 

After the base coat of paint has been applied.


Overhead view of the primed model.


You can still see a bit of the surface roughness inherent with using the Black Strong and Flexible printing material.
After allowing this to dry, I painted the hull with a coat of Vallejo black. The hull of river vessels get a heavy coat of tar and tend to be damp – I like the look of the darker hulls. 

Next step – paint the casemate. Since the consensus of color for the CSS Arkansas was a chocolate brown color, I endeavored to create a similar color for the Monster. Using a medium brush I applied a coat of Vallejo  cork brown.  After that dried, it was back to the Vallejo  black and painting all three funnels and the open gun ports.

Lastly was painting the deck, both forward and aft. The camo spray color was not bad, but I wanted something a little lighter. The solution was a coat of Vallejo  buff paint.

Painted and almost done!


Once the base coats had dried it was time for the highlights and dry brushing. I used a variety of Vallejo  gray paint including Sky Grey and Basalt Grey to high light the edges of the casemate and hull. The sky grey was dry brushed over the model to tone down the cork brown and lighten the black hull. 


The Yazoo Monster and the Pook turtle side by side. This really drives home the size of the Monster and gives you idea how it earned it's name.

The Yazoo Monster with a Pook Turtle from Throughbred Models in the rear. This is a reasonable comparison of what the Monster would have faced on the Mississippi River (though the phrase 'bigger and more' comes to mind).

Here's the Monster next to a model of USS Minnesota from Bay Area Yards that is currently stuck in the assembly queue..
 Once dry, the model was hit with a coat of gloss coat to protect the paint job and a coat of matte finish to remove the glossy sheen. Now it’s ready for the tabletop!


Saturday, December 19, 2015

Hoist the anchor and raise steam! ACW naval floats back to the surface.

After an entirely too long hiatus, I'm refocusing on my 1/600 ironclad and wooden ship collection. 2016 is going to be the year that I eliminate the back log at the shipyard and get these ships ready for the tabletop. There will be some sorting and prioritizing, but for now, there is some low hanging fruit that can be easily pushed to completion.

CSS Texas was an excellent ironclad design that saw service with the Confederate James River squadron in the later part of the Civil War. Bottled up behind obstacles and torpedoes, Texas never really had the opportunity to engage the Union Navy in a full blown naval battle. Instead, Texas contributed to the 'fleet in being' that tied down a significant number of Union warships for the last years of the war.

CSS Texas from Bay Area Yards


Beam shot showing the low profile of the casting.  Thoroughbred City class in rear for comparison.


Overhead shot sowing the detail of guns, ports, deck around and bollards.


Aside from knocking out the CSS Texas model, there were a number of fortification and building models languishing in the queue. Battery Buchanan is a ubiquitous fortification from Fort Fischer, North Carolina. The remainder are somewhat more generic pieces that can be used for most any game.


Battery Buchanan (rear), two warehouses and assorted batteries, all from Bay Area Yards.


 3-gun Earth Battery from Bay Area Yards in the back. 3 gun battery from Titan(?) in front.


I have several three gun battery models that are great for modelling the 'hasty' earthwork batteries that are thrown up repeatedly during our campaign games. Basically piles of dirt with whatever guns could be scraped together, these models get a lot of use on the gaming table.


Two brick lined batteries and warehouse models. CSS Mississippi in the rear. All models from Bay Area Yards.


Tuesday, December 15, 2015

Shapeways 1/144 BE.2C models are finished!

The last of my early war add on's were the BE.2C models. Done up in early war Western Front colors, the BE.2's will serve as targets and objectives as they attempt to perform recon and spot targets for the artillery. At first not equipped with a weapon, armament advanced to carrying a Lee-Enfield rifle for the observer and eventually evolved to a single machinegun covering the aircraft's rear. Mind you, the observer seated in the front seat was firing this gun backwards, past the pilot.

The BE.2 had a long service career and like so many other planes served well past it's expiration date. The crews suffered heavy losses against the more efficient Albatross and Halberstadt fighters.

Prop discs are from the Aerodrome store. I like how the discs really make the model pop as opposed to the static prop.

The planes were printed in White Strong and Flexible. I did the typical base coats of PVC glue followed by layers of clear gloss. In this case, the prints were very rough and required heavy amounts of sanding. The unpainted surface had what looked like a wood grain texture due to the printing process. It's not the end of the world and it can be restored, but it takes a LOT of work. I almost complained to Shapeways, but in the end, the models are still serviceable gaming pieces. 

The bases are from Litko. Rare earth magnets connect the model to the flight stand post.


Decales are from Dom's Decals and Woodland Scenics (for the numbers.)


Hobby craft paint was used for the yellow. This particular color is Lemonade.


I went a little overboard on the exhaust stains on the upper wing surface. Guess this crate has a chronic oil leak!


The oil stain is very evident in this image.


Thursday, December 10, 2015

Rising from the ashes…the Phönix C.I

All three models in line abreast. The game mat is the coastal mat from Nexus games.
In early 1918 the Austro-Hungarian Air Force - the K.u.K. Luftfahrtruppe -  deployed a new two seat biplane – the Phönix C.I. Deployed to the Flik/D and Flik/K squadrons, the Phönix C.I was used in the reconnaissance and general-purpose (i.e. light bombing and escort duty) roles supporting their respective division or Army corps. 

With a production run of 110 aircraft, the C.I was never a dominant part of the K.u.K. Luftfahrtruppe, being just 4% of the aircraft produced in 1918. It’s unique rudder and stabilizer structure gave the C.I an excellent field of fire to the rear (much like the Hansa-Brandenburg W.12 or W.29). 


The C.1’s were pressed into the air defense role as the imbalance in production rates saw the weight of numbers shifting in favor of the Italians. The Italian 1918 air offensive put the K.u.K. Luftfahrtruppe mostly on the defensive, though limited tactical bombing and the occasional strategic mission still occurred.
 
One of the models done up in the gray and green colors that research indicates is more prototypical.

 
This C.I has the Italian right where he wants him.

These models are from the Shapeways shop of colinwe.  The listing for the Phonix C.I has several options for materials. All three of the models were done in White, Strong and Flexible. WSF does require a bit of prep work to get a good painting surface. As an aside - I recommend the Black Strong and Flexible as it’s an easier surface to prep (it still needs some work).  Yes, it costs slightly more, but the result is worth the investment.

Overhead shot of all three models.

Painting of the models were a case of a variation on a theme. Working from a Jack Herris plate, the first plane ended up with a brown and green pattern more reminiscent of the WWII Luftwaffe. Next was the same type of pattern but using colors the text indicates were more prototypical based on research of a museum aircraft. Lastly was a lighter palette choice that more closely matches the Herris artwork.
Decals help enhance these models. The national markings are a mix of I-94 and 1/144 Direct. The white stripe is from a set of S Gauge boxcar decals.

The C.I's in a loose V formation. The squadron leader has the classic Austro-Hugarian red-white=red stripes on the tail.

The one area that Shapeways designers are still working on is including crew figures for the planes. While the basic airframe is very nice, adding crew helps bring the plane ‘alive’. For these planes, I used crew figures from Riveresco. The pilots are mostly lost to view, but the gunners are very much on display. 

A Flik/D en route to bomb an Italian bridgehead. Prop discs and bases are from the Aerodrome store.
 

Sunday, December 6, 2015

Queen of the North Sea sky


We often think of the air war in the Great War as one between dueling individuals. “Knights of the Air” atop their aerial steeds sparring in combat over the muddy trenches. It was the origin of the fighter pilot mythology – one man risking it all in battle with a gallant foe. As with many things the reality was much more complicated. The air war over the trenches was fought for specific aims – air photo reconnaissance, artillery observation and bombing. 

But a second, less glamorous air war existed. One that was as important – if not more important – to the ultimate outcome of the war. That was the air war at sea.  While naval aviation had no direct effect in the rare battles between the fleets, aviation was critical in the areas of naval patrol and interdiction. Airships and aircraft of both sides patrolled the North Sea on the hunt for u-boats, enemy aircraft – including airships, light coastal craft, warships and mine layers. In a defensive role, they escorted their own forces through dangerous waters. 

By late 1916 The Felixstowe flying boats were the premier patrol aircraft in the North Sea. Possessing great range, a good bomb load and impressive armament for the day, these aircraft were the Queens of the North Sea sky. 

Overhead view - roundels from Dom's Decals.


Felixstowe F2 early model ready for action. The red lines on the base denote various firing arcs.


Wings of War included the Felixstowe F2 (And Curtiss H-12) in the expansion game “Flight of the Giants”. You thought the Caproni and Gotha were big – think again! The Felixstowe is huge with a broadside of enough machineguns to make any German pilot think twice about engaging in combat. So much so, that the Germans would throw flights of W12 and W29 at a Felixstowe to even the odds a bit.  

Several nice models of the Felixstowe can be had from Shapeways from either Decapod or Colinwe. I ordered mine in the standard White, Strong and Flexible material. The model is an impressive piece of resin. The wingspan actually exceeds the length of the range ruler for the Wings of Glory game.
I didn’t model a specific historical paint scheme for this aircraft. Many of the planes were painted in a dazzle paint scheme. It was not as much camouflage as it was a colorful easily identifiable pattern to help identify a plane. Unfortunately this is something that is beyond my skill set to paint. 

Good port quarter shot of the model.


I went with a fairly bland combination of PC 10 for the fuselage and camel for the wings. It’s a fairly conventional scheme. To make it somewhat unique, I used decals from a variety of sources to put identification marks and symbols on the aircraft hull. 

The flag was scavenged from a set of decals for an Avro CF-105 kit.


Good shot of the magnets joining the model to the flight peg. The grain of the White Strong and Flexible surface is visible here, but when back up to normal game viewing distances the grain fades from view.


A strong rare earth magnet was attached to the bottom of the hull and paired with a magnet on the flight peg. This ensures the plane is not likely to tip over or fall off it’s stand. The magnets came from K&J Magnetics

The base ships without color. I had to paint all the lines and text. This is easy - the lines are laser cut and a paper backing protects the surface of the base while you paint. In hindsight - white is a better color choice for the altitude numbers on the acrylic base. The black numbers fade into the playing mat when not on the straw colored field,


The custom base is a product of the Aerodrome store


I know - I can't paint a straight line. 

Now to get this beast onto a table for a game!

Thursday, December 3, 2015

A Pastiche of Pushers


Recently, we’ve been playing more early war. While it’s been fun using the earlier fighters, I’ve grown weary of the same match ups of Eindeckers, Moraines and DH.2 from the available models. There were a number of early and mid-war planes used by the Allies that Wings of Glory does not yet support that I’d like to see on the table. I won’t get into a discussion of why that’s the case other than to say as an old school gamer, I’m in the camp of right rules for it and let me worry about finding a model.
In my last order with Shapeways, I chose to expand our gaming options by through the acquisition of several pusher planes. Though ultimately an unsuccessful design path, pushers served extensively during the war, in some theaters right up to the end. 

For the early war period, I selected the Vickers FB-5 ‘Gunbus’. Without a synchronizer, the Gunbus used the pusher design to give the gunner a wide field of fire to the front. Vulnerable to fire from the rear, slow and with poor maneuverability, the FB-5  was withdrawn from combat in 1916 when the Germans began fielding Halberstadt’s and Albatross biplane fighters.

The FB 5 on the left in the middle of the painting process.


Almost finished! Roundels from Dom's Decals. Number decals from Woodland Scenics.


The model has a magnetic ball bearing attached to the bottom which allows it to pivot on the top of the stand.


Here the plane is pitched up in a climb. The ball bearing is clearly visible on the bottom.


...And pushed over into a dive.This is about the limit of the pitch down. The support peg is hitting the landing gear struts. Decals on the tail are salvaged from an old Avro CF-105 model kit.


The stop gap solution to the new German fighters was another British pusher design – the Royal Aircraft Factory FE.2c. Similar to the FB-5 with a two man crew and pusher layout, the FE.2c was a larger aircraft that mounted an additional machinegun mounted on a pedestal giving the gunner the ability to shoot to the rear of the aircraft. To use the rear gun, the gunner would stand in/on the cockpit and shoot to the rear – seeing in done on the ground was one thing, but imagine doing this in air combat with the plane pitching about and you with no parachute! 

The Shapeways FE.2c in the final stages of decaling.


All based up and ready for gaming. Unlike the FB 5 this model has a flat magnet on the base which does not allow the model to be pitched about it's axis. Decal's are also from Dom's Decals and Woodland Scenics.  You can see a bit of graininess to the upper surface of the right lower wing. This is an effect of the White Strong and Flexible material. It's a bit exaggerated in this close up. At normal gaming distances, you don't notice it.

Rear quarter view of the FE.2c. The base is from Litko Game Accessories  


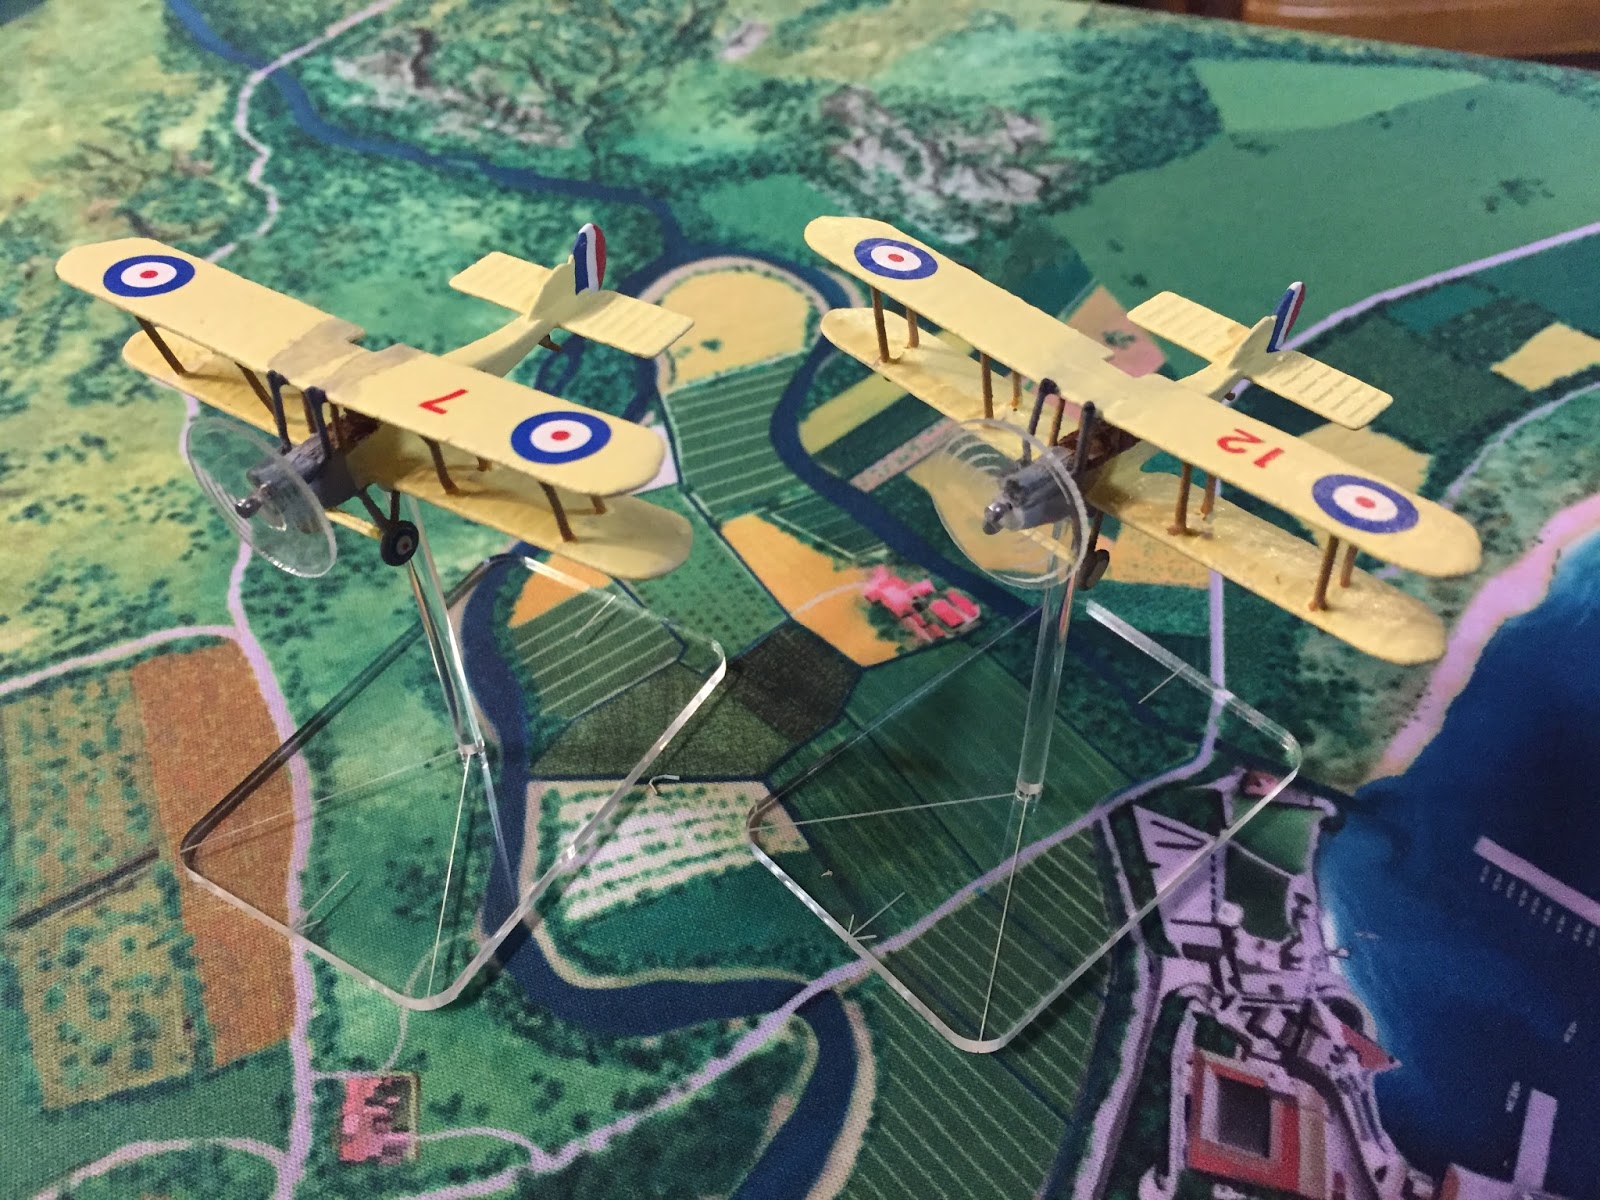
Rear view of the model on it's base. The playing mat is from the Nexus Wings of Glory product line.


Front port quarter view. The crew were printed in the cockpit as was the forward gun. The rear MG is not modeled. Decals from Dom's Decals and Woodland Scenics.
 The FE.2c served through Spring of 1917 being the main victim of the German fighters during “Bloody April”. They were soon superseded by the Sopwith Pup and Camel and relegated to Home Defense and training squadrons.


Last up and really more of a late war plane is the Savoia-Pomelio SP 3. A pusher design that was an Italian evolution of the French Farman pusher, the SP 3 retains  many of the features seen in the prior examples above. A two seat biplane pusher armed with a machinegun (or more rarely a 20mm cannon) the SP 3 was used extensively for reconnaissance and artillery observation well into 1918.

The SP-3 nears the end of painting. The tricolors on the vertical stabilizers had to be hand painted. I can't paint a straight line to save my life. You make do with what you have. The gunner and the MG were 'printed' as part of the model.


With most of the decals applied. Dom's Decals was the source of the roundels. The nice thing about Italian planes is they use half as many roundels as other countries because the bottom of the lower wing has the national colors painted across the entire surface. I'll look for a picture of it...


Quarterview showing off the struts of the tail booms.
 
 Like most other pushers it was slow with poor maneuverability, especially compared to the much more modern designs in use by 1918. In a perfect world, it would have been retired and replaced with Pomelio PD and PE two seater biplanes, but the disastrous retreat of the Twelfth Battle of the Isonzo (Better known as Caporetto) resulted in the loss of massive numbers of Italian aircraft. While the Italian RFC regrouped and re-equipped with the more modern designs, the SP3 was retained in service. It was not until summer of 1918 that the SP3 was replaced. 


It's 1918 and the SP3 has been caught out by this Phonix C.II (Another model from Shapesways to be covered in a future post)


The Phonix C.II gains position to the rear, unless the Haroit HD-1's join the fight, the SP3 is in serious trouble.  The C.II is on a base from the Aerodrome, while the SP3 is on a base from Litko Game Accessories.
 
These were all easy models to produce. The great thing about 3D printing is not having to fuss with assembling struts and booms – the whole model is assembled and ready for painting. All three were printed using White Strong and Flexible (WSF) material.
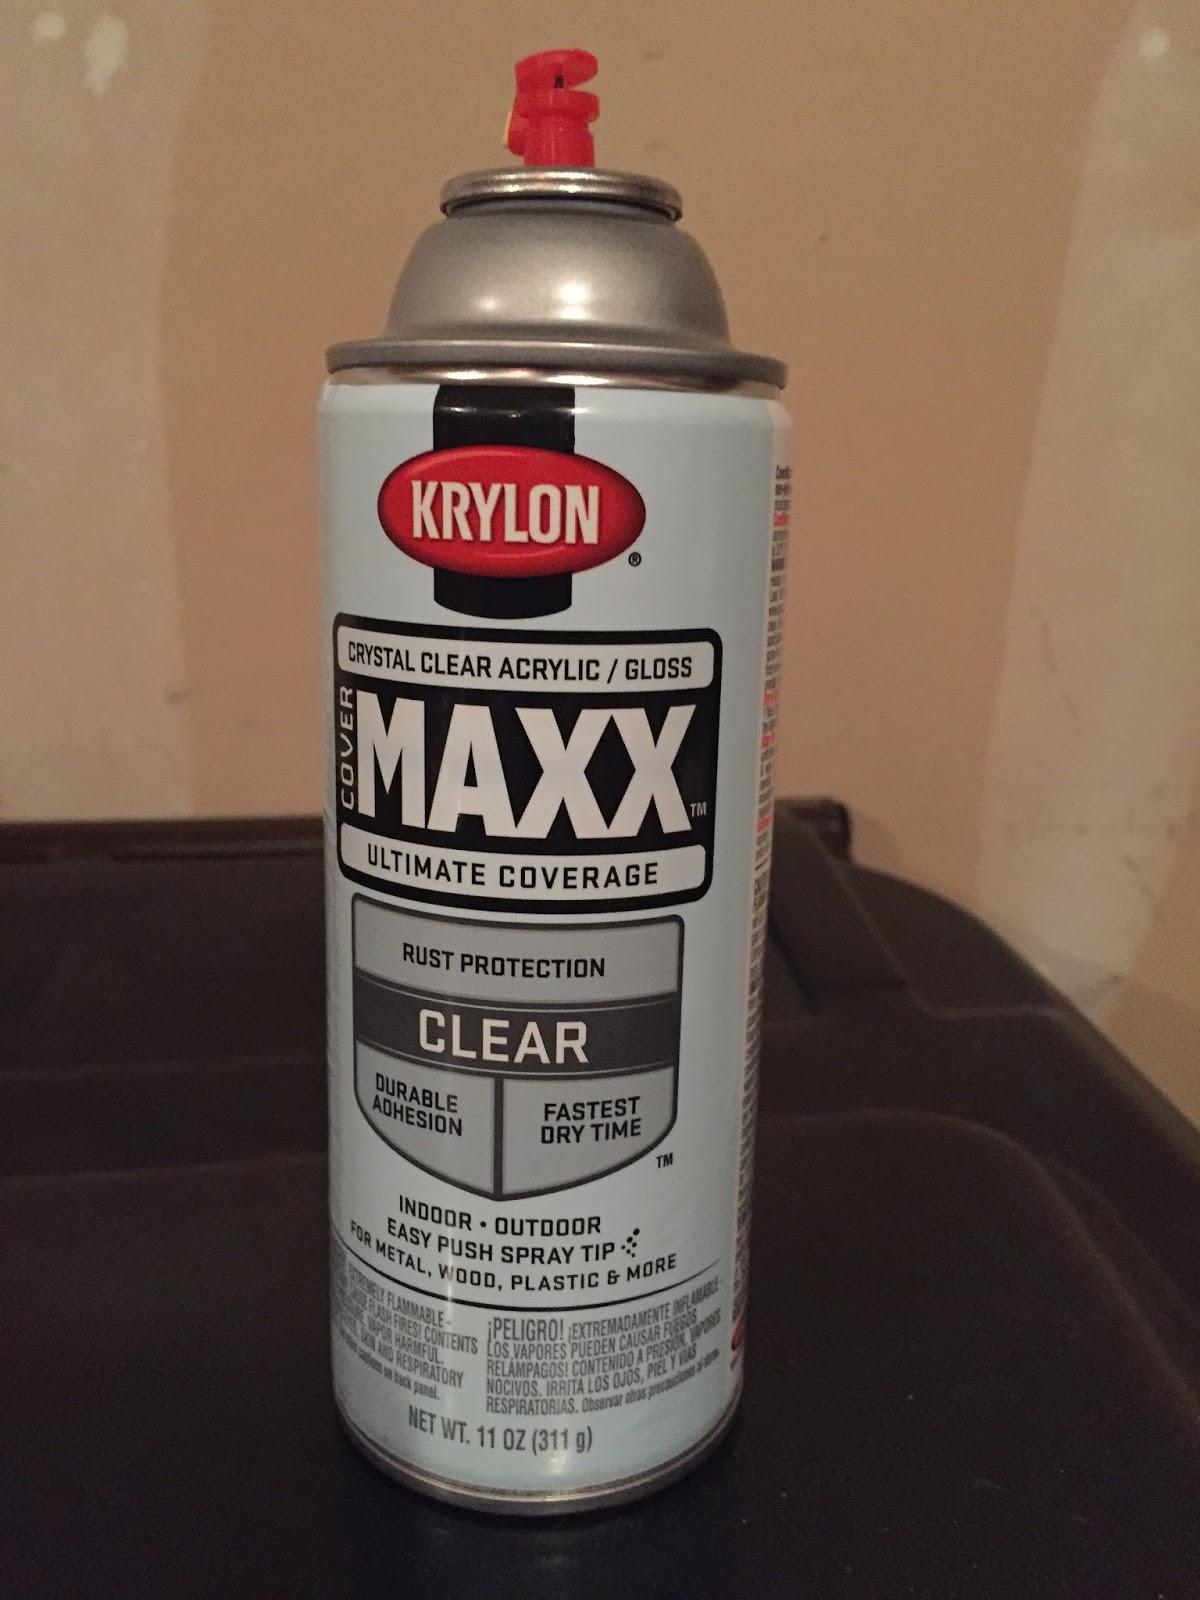
For painting, I’ve come to believe that the most important step is surface preparation. The porous, gritty nature of the WSF material can be corrected. I use diluted PVA glue for the first soaking to file the subsurface, but following that I used multiple light coats of gloss clear coat. 
 

It can take many repeated coats, but the results pay off in a smooth surface that takes primer and paint very well. 

The planes were painted with a mix of acrylic craft paints (Americana, Alene’s, etc.) and Vallejo paints. Camel was used for the wings on the FB5 and FE2. Vallejo Buff was used on the SP3 wings. Sky Gray is a great match for much of the gray skins and struts. Brown Violet is the stand in for the PC10 Olive Drab color and flat brown/cork brown.